 OK, let's get started...
CPP Mini subframe kit install
This page describes the installation of Classic Performance Products' 62-67 Nova mini-subframe kit. The original setup is a lower control arm with one pivot point, and a strut rod. The CPP kit replaces the lower control arm (LCA) with a more modern two-pivot setup, and eliminates the strut rod. The result is a much more stable front suspension. I had completely rebuilt the stock suspension, and was still having trouble getting the alignment to stay put. I have not put many miles on the kit yet, but I can already say that it's got a much more solid feel than it did before.
CPP has several versions of this kit. The basic kit has the new LCAs, and everything you need to install them. The next step up includes new front springs and spindles, while the deluxe kit includes upper control arms as well. Check http://www.classicperform.com for more details. You can also purchase the kit through National Nostalgic Nova http://www.nnnova.com and several other Nova parts vendors. As of this writing, the basic kit is about $350.
I kept my original spindles for this swap. I did not notice any significant change in the positioning of the wheel in the wheelwell, either front-to-back, or track width wise.
[WARNING/DISCLAIMER: use this information at your own risk, modifying automobile suspension systems can lead to dangerous situations, always have a trained mechanic check your work, I take no responsibility for the results, you've been warned, you're on your own...]
The instructions that come with the kit are...sparse. Although it's not very difficult to install, hopefully this page will help fill in some of the details.
General tips:
- Leave all of the plate and pivot bolts very loose until you have everything installed. Then go back and make a few passes to gradually tighten everything up to the final torque.
- You will need a way to support the front of the car so that you can have both wheels off at the same time. I used metal ramps underneath the subframe just behind the firewall.
- The lower balljoints need to be removed from the spindle. They are usually very difficult to get out without the proper tools. I used a 'pickle fork' to wedge in between the balljoint and spindle. There are also gear-puller style tools that can be used to force the balljoint stud out of the spindle. There's not much room to hammer in there.
- You will need a front end alignment after the kit has been installed.
- Make sure things are basically straight before you start. If you have accident damaged suspension pieces to start with, you should get things straightened out before you try installing this kit.
- The original strut rod brackets need to be removed to install this kit. This can be the single most difficult part of the installation, as most originals were riveted on at the factory. An air hammer seems to be the easiest way to get these out. I drilled through the heads of the rivets with a 1/4" drill, then used a cold chisel to snap them off. That operation isn't pictured here as I did that years ago as I needed to replace the brackets to repair some modifications done by a previous owner.
- CPP seems to be working the bugs out of the kit somewhat, the flat washers that came in the big hardware bag with the nuts and bolts did not fit on the bolts. They were just a tad too small. After fussing around with one for a few minutes, I discovered a separate bag of replacement flat washers that fit great.
- The general hardware bag has 14 sets of nuts/bolts/flatwashers/lockwashers. 10 of those are used to attach the plate to the mounting points that the strut rod brackets were attached to. The other 4 are used to attach the balljoints to the LCAs.
OK, let's get started...
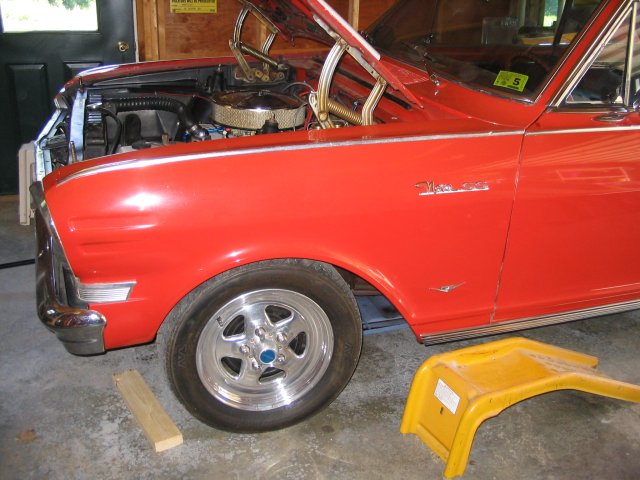
 Wheels off, car on jacks...
 Here's the 'before', the
lower control arms have got to go
Here's the 'before', the
lower control arms have got to go
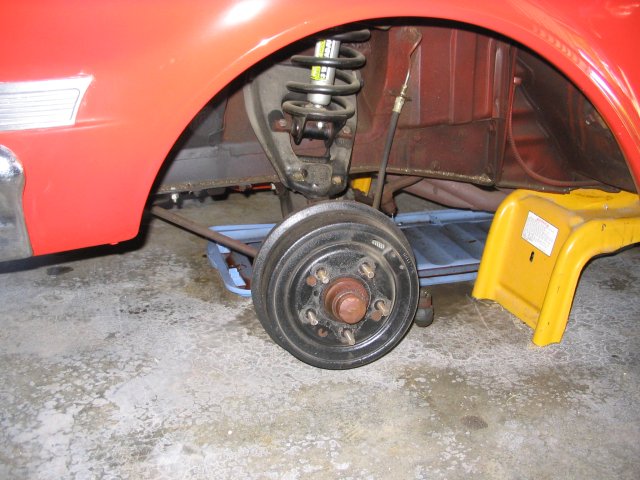
 Front shot showing stock
LCA and strut rod
Front shot showing stock
LCA and strut rod
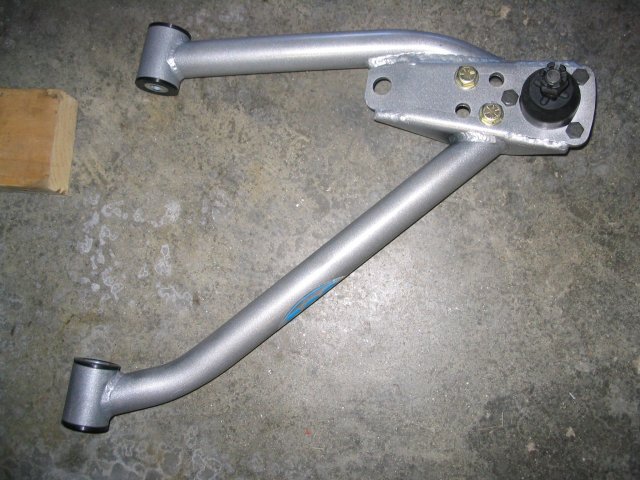
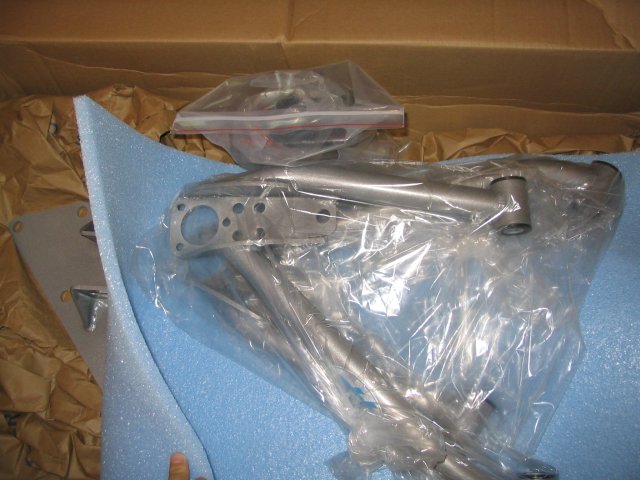 Here's what you get in the
box
Here's what you get in the
box
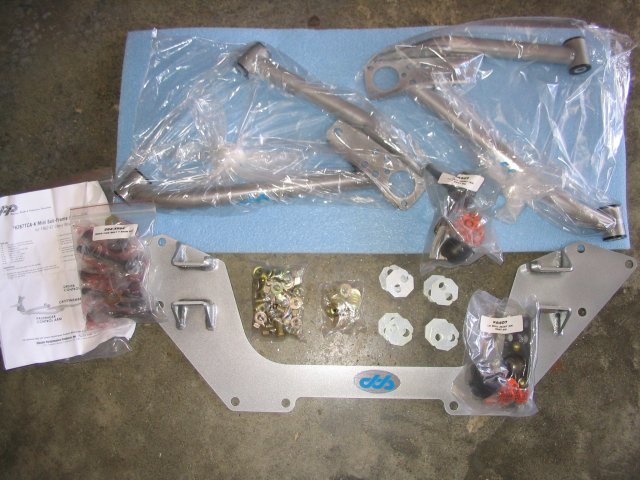 Tubular LCAs, frame plate,
and hardware
Tubular LCAs, frame plate,
and hardware
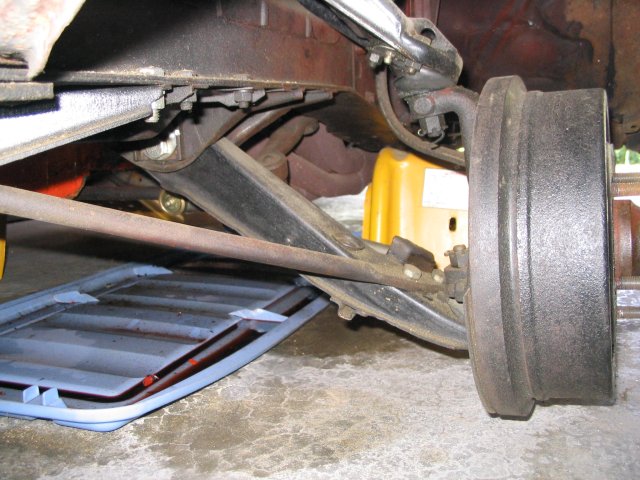
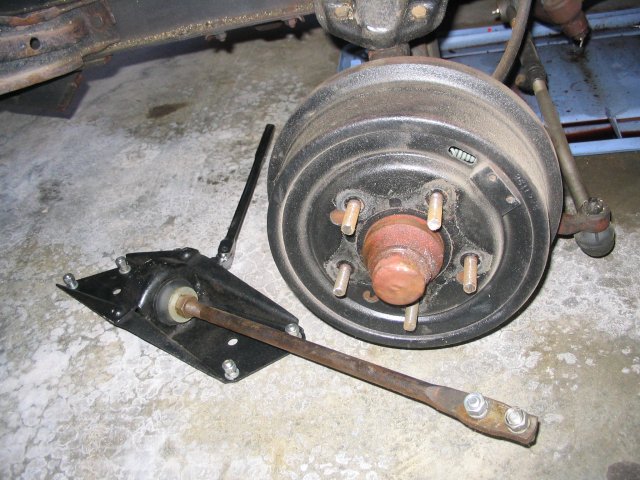 Enough of the pretty new
parts. Keep working! Strut rod removed. The 4 bolts on the rod housing are rivets
on most cars. You'll need to grind off the rivet heads to remove the strut rod
housing. The strut rod unbolts from the LCA. You may need to remove the strut
rod to get access to the rivet heads.
Enough of the pretty new
parts. Keep working! Strut rod removed. The 4 bolts on the rod housing are rivets
on most cars. You'll need to grind off the rivet heads to remove the strut rod
housing. The strut rod unbolts from the LCA. You may need to remove the strut
rod to get access to the rivet heads.
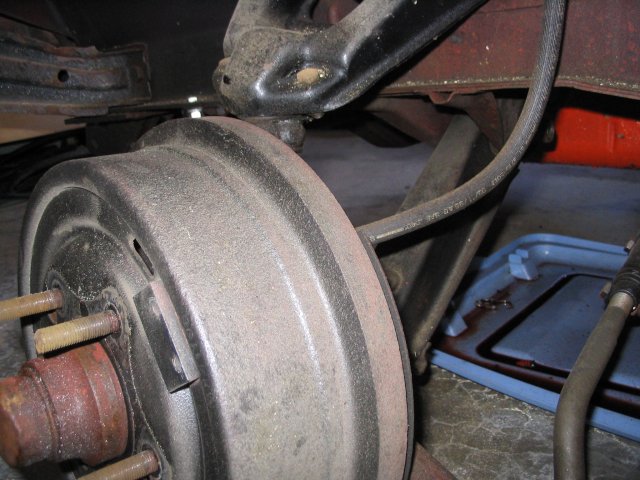
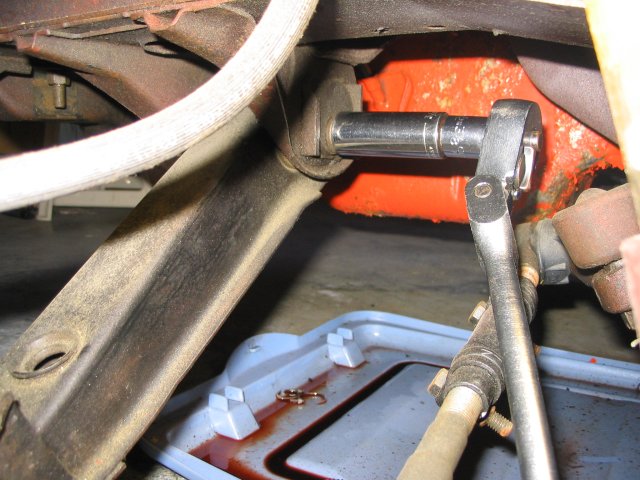
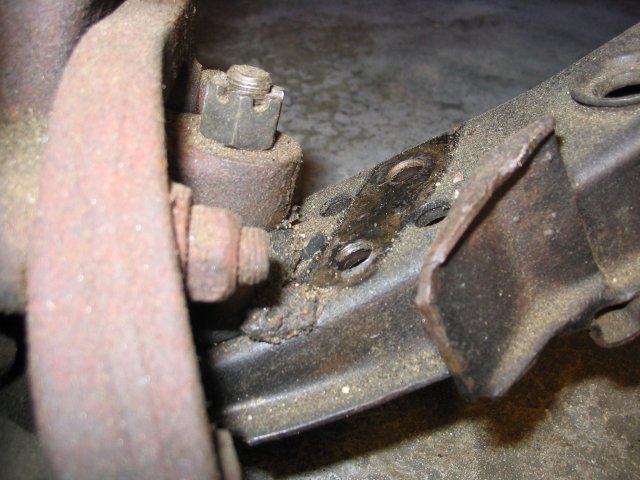 Here's where the strut rod
attached to the LCA. You will also need to remove the cotter pin and castle
nut from the lower balljoint stud.
Here's where the strut rod
attached to the LCA. You will also need to remove the cotter pin and castle
nut from the lower balljoint stud.
 Removing the camber adjustment
bolts
Removing the camber adjustment
bolts
 ...and the castle nut on
the lower balljoint
...and the castle nut on
the lower balljoint
 The LCA caster eccentric
bolts being removed
The LCA caster eccentric
bolts being removed
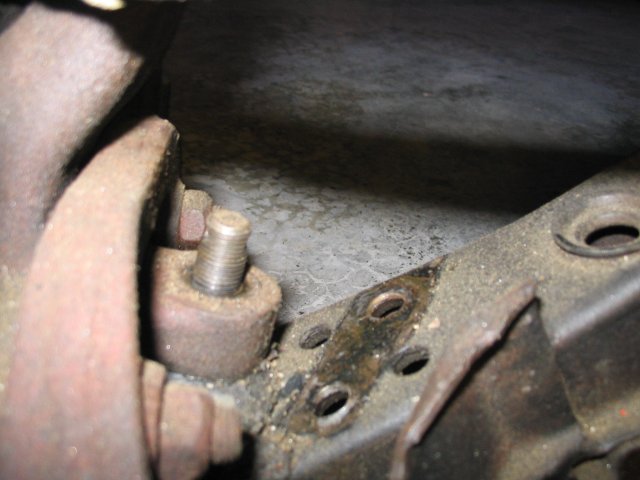
 ...which detaches that end
of the LCA from the car.
...which detaches that end
of the LCA from the car.
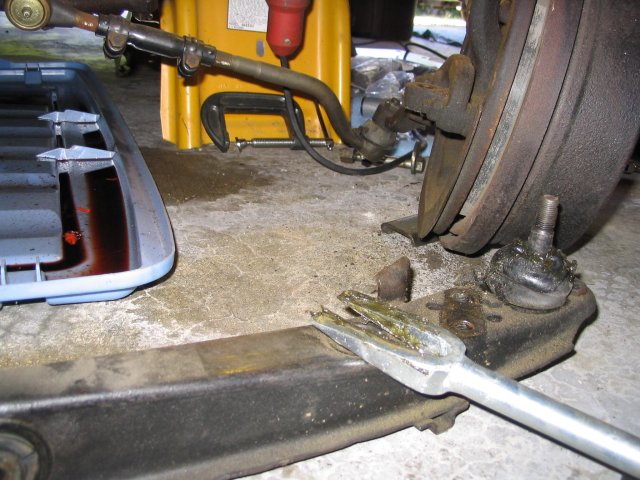 Pickle fork tool used to
get the lower balljoint out of the spindle.
Pickle fork tool used to
get the lower balljoint out of the spindle.
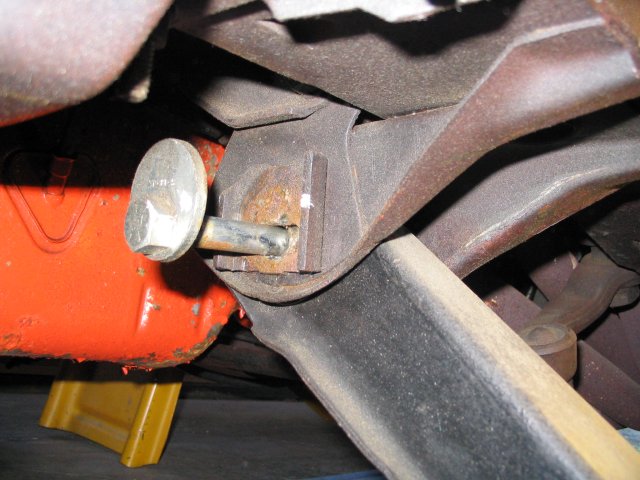
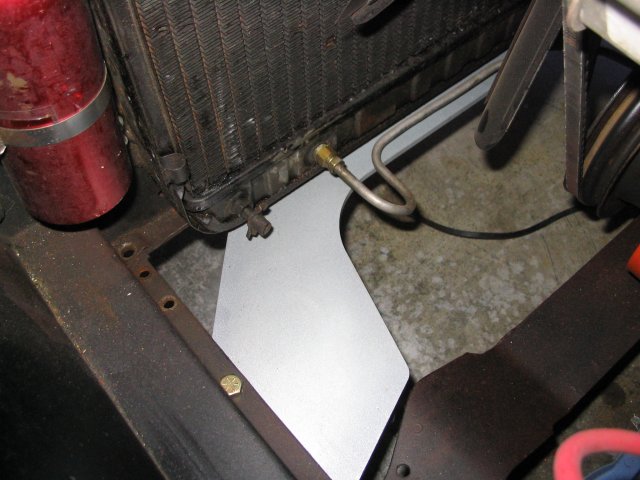
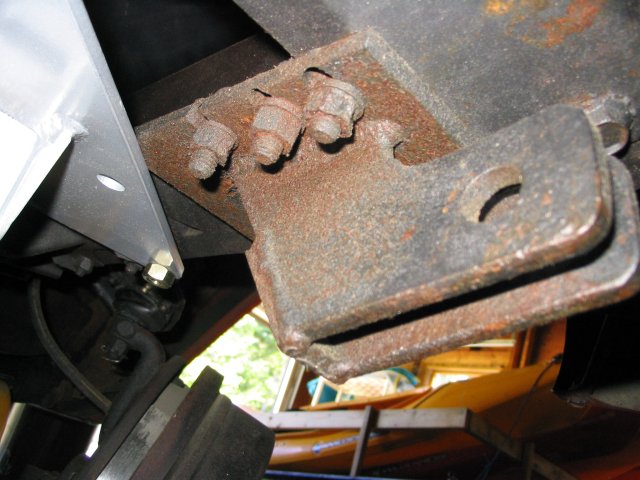 Test fit of the frame plate...interference!
My car had Ol'Skool tow tabs on it. They need a trim on the corner to clear
the plate.
Test fit of the frame plate...interference!
My car had Ol'Skool tow tabs on it. They need a trim on the corner to clear
the plate.
 tow tabs removed, bolts installed...very
loose to start.
tow tabs removed, bolts installed...very
loose to start.
 All the holes line up!
 Here's the plate from the
engine compartment.
Here's the plate from the
engine compartment.
 Hard to see, but there's
holes down there. You will need to remove, or at least loosen the radiator to
get access to the holes under there.
Hard to see, but there's
holes down there. You will need to remove, or at least loosen the radiator to
get access to the holes under there.
 New balljoint (included in
kit) installed in the new LCA. The 3 dark bolts are in the bag with the balljoint.
The other two are in the plate hardware bag. TIP: now is a good time to put
some grease in that fitting.
New balljoint (included in
kit) installed in the new LCA. The 3 dark bolts are in the bag with the balljoint.
The other two are in the plate hardware bag. TIP: now is a good time to put
some grease in that fitting.
 Balljoint all snug in the
new LCA. The instructions for the balljoints say 22-26 lb-ft on the three black
bolts, and they didn't mention the two larger ones. I tightened those to 60
lb-ft, TIP: Turn the stud on the balljoint so that the hole for the cotter pin
is facing front to back. That will make it easier to put the cotter pin in later
on.
Balljoint all snug in the
new LCA. The instructions for the balljoints say 22-26 lb-ft on the three black
bolts, and they didn't mention the two larger ones. I tightened those to 60
lb-ft, TIP: Turn the stud on the balljoint so that the hole for the cotter pin
is facing front to back. That will make it easier to put the cotter pin in later
on.
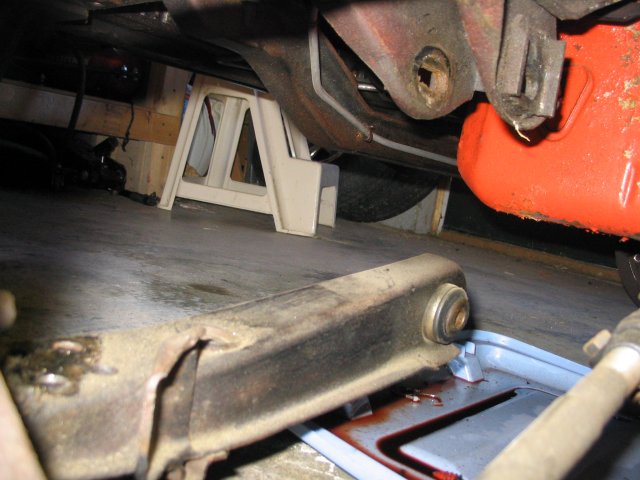
 Hoisted into position...
 pivot bolts in...crown nut
on balljoint. The pivot eccentric bolts can be installed two ways. The parts
bags have round and octogon washers. You can use either style (but you should
pick one and use it everywhere). The round ones have the advantage of giving
you finer control on the alignment, but the stock setup (that used these) was
notorious for slipping after the alignment. The octagon washers can be rotated
to get a variety of offsets, but you only have those offsets to choose from
when doing the alignment. On the plus side, the octagon washers won't change
setting. I used the octagon ones, and installe them at the '0' setting everywhere.
On my car, that happened to work out to close to the right setting.
pivot bolts in...crown nut
on balljoint. The pivot eccentric bolts can be installed two ways. The parts
bags have round and octogon washers. You can use either style (but you should
pick one and use it everywhere). The round ones have the advantage of giving
you finer control on the alignment, but the stock setup (that used these) was
notorious for slipping after the alignment. The octagon washers can be rotated
to get a variety of offsets, but you only have those offsets to choose from
when doing the alignment. On the plus side, the octagon washers won't change
setting. I used the octagon ones, and installe them at the '0' setting everywhere.
On my car, that happened to work out to close to the right setting.
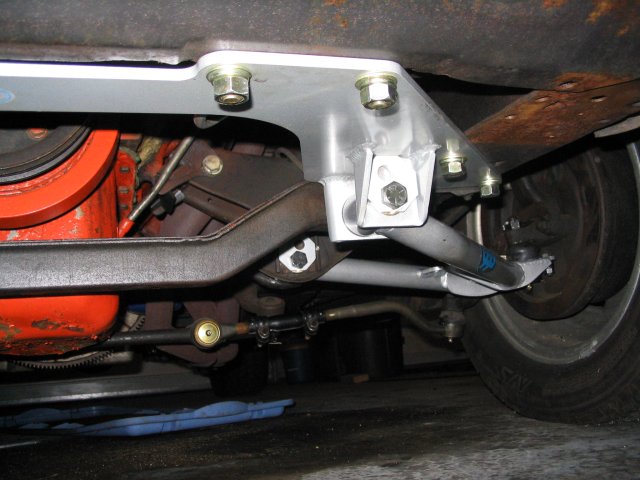
 Everything is sorta connected
now, but it's all still very loose. The CPP instructions didn't specify, but
I put all the bolt heads on the topside, and all the nuts on the underside.
I used one flat washer on top, and a flat washer and lockwasher underneath.
Everything is sorta connected
now, but it's all still very loose. The CPP instructions didn't specify, but
I put all the bolt heads on the topside, and all the nuts on the underside.
I used one flat washer on top, and a flat washer and lockwasher underneath.
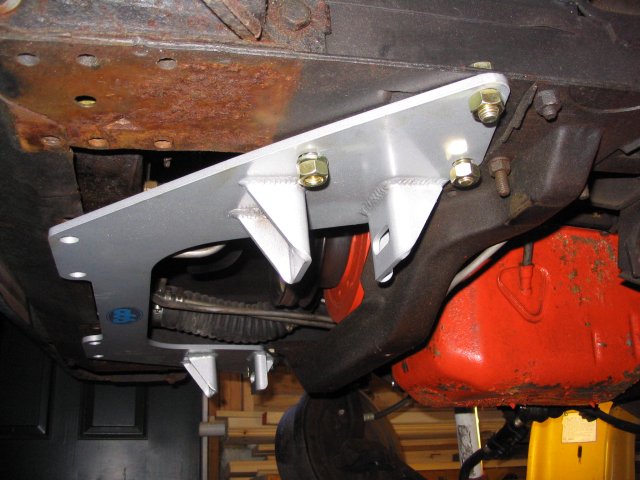
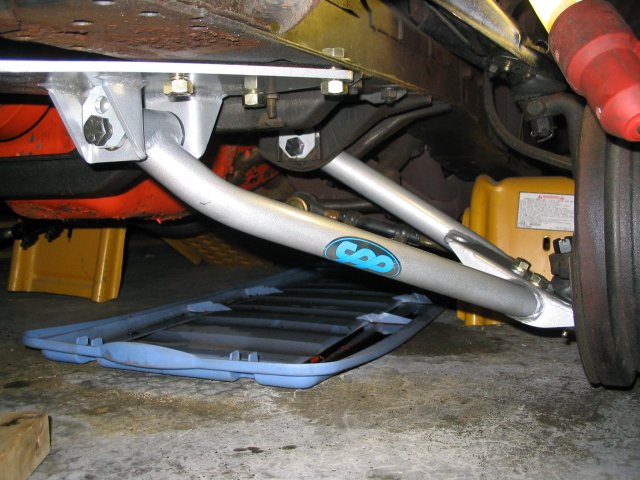
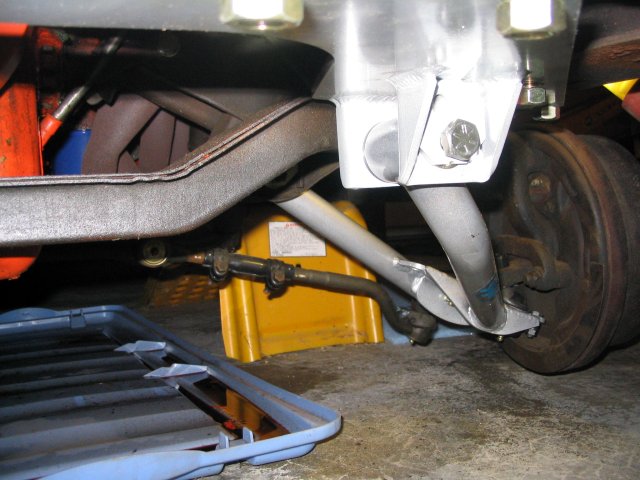
 All tightened up and ready
to go. Again, the CPP instructions didn't specify any torque readings, so I
tightened all of the plate bolts to 60 lb-ft. I also tightened the pivot/eccentric
bolts to 60 ft-lb.
All tightened up and ready
to go. Again, the CPP instructions didn't specify any torque readings, so I
tightened all of the plate bolts to 60 lb-ft. I also tightened the pivot/eccentric
bolts to 60 ft-lb.
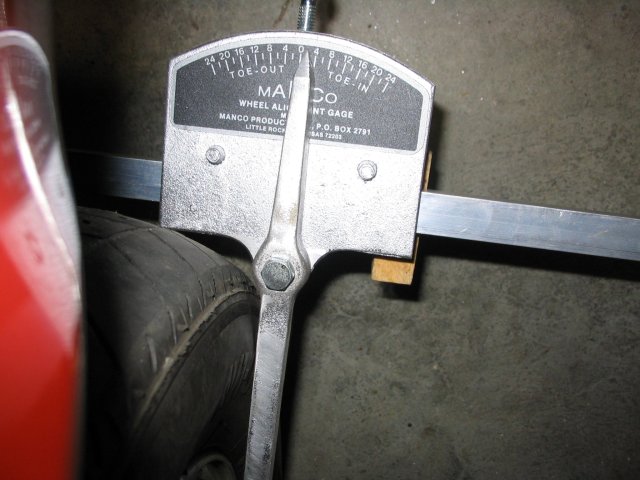 Adjusting the toe-in. The
tie rod adjusters need to be set for proper toe in. Here is 2/32", (or
1/16") toe in. The gauge is from http://www.eastwood.com
and is great for setting toe-in, but doesn't help for caster or camber.
Adjusting the toe-in. The
tie rod adjusters need to be set for proper toe in. Here is 2/32", (or
1/16") toe in. The gauge is from http://www.eastwood.com
and is great for setting toe-in, but doesn't help for caster or camber.
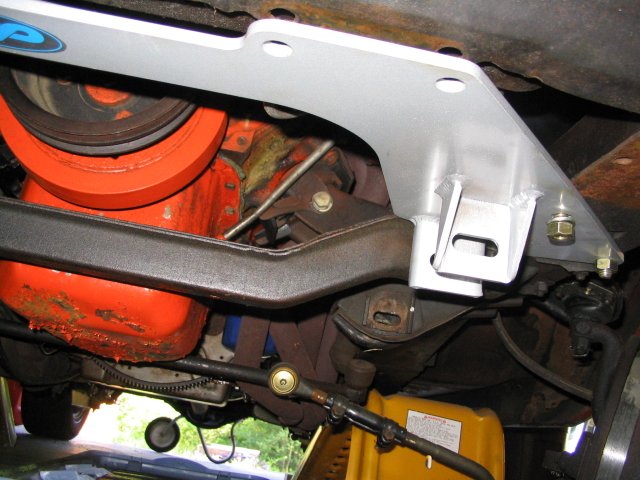
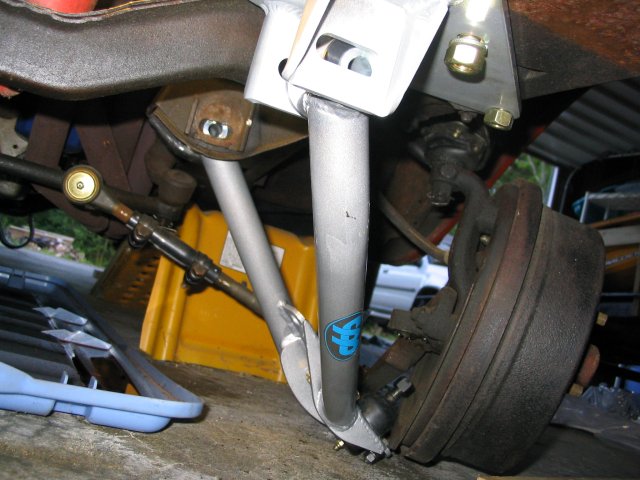
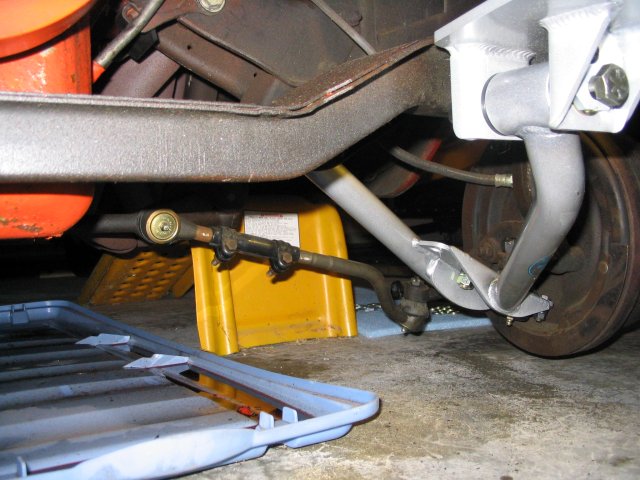
 Finished!
 Other side too!
Now you're going to want to get a real alignment to make sure everything is pointing the right direction. Don't forget to lube the new balljoints (the package says they're pre-lubed from the factory, but I don't trust 'em...) and put in the cotter pins on the balljoint castle nuts.
patman@bracketracer.com
Unless otherwise specified, all text and images on this page are © Copyright 2006 by Pat Mancuso.